Monday, November 21, 2022

Lights - fluorescent to LED conversion complete

 Ta daa


I now have a working conversion of one of Herbie's previously fluorescent tube  lights now replaced with LEDs.

It took a couple of prototypes to get the result I wanted, so here's what I learned.

You need a little 12v voltage regulator to protect the LEDs against over voltage - the boat's batteries can be anything up to 14.4 volts when the engine is running.  I tested it with a 14v input. The first regulator I tried worked, but I soon realised that it wouldn't carry enough current to drive all the LEDs needed to make the light bright enough.  No problem, I replaced it with an L7812 chip costing all of £0.46 from Bitsbox who are great for small quantities or electronic bits and pieces.  A couple of cheap capacitors, one on the input and one on the output to protect against spikes and Bob's yer uncle.  


The LED's come in a sticky backed strip 


so they're easy to install on the plastic plate where the fluorescent tubes were.  The LED strip costs about a tenner for 15 metres and I used less than a metre so call it about 80p. Other bits and bobs -a bit of stripboard, tiny bits of wire and a few blobs of solder.  Lets say a couple of quid for the whole conversion - plus postage to buy the bits. £2.20 postage will be enough to buy all the bits to convert several strip lights.  Herbie has 7 such units.

I measured the current it draws and its about 180 milliamps which at 12v makes about 2 watts by my reckoning.  Compare with the two fluroescent tubes which are 8 watts per tube and you can see the power saving.

Next I need to install it in the boat and compare the brightness against the fluorescents  on the other side of the saloon.  I'm not sure whether they will be quite as bright.  Then the only other thing is to see how long the LEDs last.  I'm told they can be a bit dodgy if the electrics aren't right.  Time will tell.  I won't convert the rest of the strips until this one is proven over the winter.

Wednesday, November 16, 2022

More on double glazing

 Following yesterday's post when I mentioned Herbie's secondary double glazing, Debby asked about the material used for the panes and how it was attached.  I had a feeling I'd written this up before and looking back, I found this, shown below, which I don't think I can improve on. All I can add is that these frames are now at least 16 years old and holding up well.  The PVC is still clear. 

Here's what I wrote in 2016

I claim no credit at all for this valuable and ingenious addition to our windows, it was all done by Herbie's previous owner Roy who was a dab hand at such things.

Basically what we have is a made to measure set of simple wooden frames over each of which is stretched flexible transparent PVC of the type use for tent windows.  Roy managed to stretch it very tightly so there are no wrinkles or ripples.  The material itself is very strong and durable.

I found a few old photos to show how they fit. First this one of the galley window where you can see the frame in situ.


As you can see the frame has a central vertical spar for strength. The whole thing is a tight push fit into the outside of the boats window frame, leaving an air gap of perhaps an inch and a half.  lets look more closely.


Here's a corner showing that the frame is really simple being mitred and stapled at the corners.  I can tell you is is pretty rigid though and has stood up to more than ten years of use without bother.  You can also see the swivel tab which holds the frame in at the corners. Couldn't be simpler could it?

The secret of course is the precision with which Roy made the frames.  They really are a close push fit with the slightly compressible pvc I suppose being squashed tight between the double glazing frame and the boat's normal window frame.  I doubt very much they are completely airtight, but they work well enough to virtually eliminate condensation between the frames as long as you take care to have it all very dry when you install them.  and of course the pvc facing the inside of the cabin doesn't get condensation either.

Here you see a third picture showing the top centre of the frame.  The fit is tighter than it looks.  each frame is marked with which window it fits and which way is up e.g Starboard No2 TOP


The little ribbon tag is needed to pull the frames out when we remove them after the winter.  That pvc needs a clean doesn't it?  We just wash it with soapy water now and again.  The stuff is pretty clear over all and as you can see from the top picture, the view out of the window is only very slightly compromised.

So there it is.  It really works even though there is no fancy carpentry.  There are frames for each of Herbie's seven windows. During the summer, we take them out and store them at home.


Tuesday, November 15, 2022

Safety

 I believe the word I am searching for (which seems to be in currency among the younger generation i.e. those under 50), is "Yay".  Herbie passed her Boat Safety inspection yesterday.  I always get nervous about the gas leak test because if there is a tiny weeny weep,it shows up and it's a pig to find out where it is.  However this time the pressure held steady for the requisite 5 minutes so we were fine.

I don't think Mike Allen who did the inspection would mind if I described him as 'old school'.  Both of us would take that as a compliment I think. Mike is long experienced and knows what he is doing and not entirely enamoured of some of the BSS regulations.  When I offered to show him our smoke alarms, for instance, he complained that having working (or non working even) smoke alarms in not a BSS requirement!  In a boat safety test!  According to Mike it took some pleading from inspectors to get the scheme to adopt the requirement for CO alarms (we have two on Herbie).

In other news, we just bought some coffee logs from Tescos.


We haven't tried burning one yet so all I can say is that they seem very heavy and cost £8 a bag (of ten?).  According to the blurb they burn hotter and produce less emissions than wood and they're made of recycled coffee grounds.  They claim they burn for about an hour.  Anybody out there tried them yet?

While we're on the subject of keeping the boat warm, we've just put in Herbie's secondary double glazing for the winter.


These frames were made by Herbie's previous owner Roy and each one is a tailored fit for particular windows on the boat, being handily labelled Starboard no 1, Port no 2 etc. (7 in all) Actually their main benefit is cutting out the condensation which otherwise forms on the windows overnight, and at that they do a really good job.

I've brought my converted LED light home ( see previous post)  to test before I inflict it on the boat.  I don't want go go round blowing boat fuses if I can help it.  I just have to dig out a 12v+ power supply from my box of old wall warts and give it a try.  Stay tuned.


Sunday, November 13, 2022

LED strip lights

Before I start on the lights, take a look at this great photo taken by fellow boater Sue Tilson at our marina. It's her entry into the moorers' association photo competition.  It got my vote but it only came equal third.


I think it's a stunner, very Turneresque, and what's more, if you click it up big you may be able to see that the boat sticking out at he left is none other than Herbie!  Thank you Sue for letting me post this here.

Well I've sort of finished a prototype conversion of a fluorescent strip light into an LED one.  I've learned a bit in the process so I'll pass it on.  Perhaps the first thing to say is that I haven't been able to test it yet because we're at our son's place in Cambridge and he has no 12v (or thereabouts) DC supply to hand.  Anyway here are a couple of pictures showing what I did.

Here's the old fluorescent tube starter circuitry which you have to take out.


Once you get the back of the light fitting this circuit drops out easily.  Then you just have to dispose of it as you see fit.

Then I chose to make a little circuit to protect the LEDs against voltage variations and spikes.  You don't need to know much about electronics to do this and the parts are very cheap.  All it is is a little 12v voltage regulator with a capacitor each side of it to smooth out incoming and outgoing voltage spikes.


The little black thing in the shadow is the voltage regulator (costing 30p). I suppose the total cost of the bits is less than a pound, and it fits in nicely where the old circuit was.  The output wires to the leds are on the right.

Flipping the thing over we see the LED strip which is connected by a little plastic connector (again costing only pence).  The LED strip itself is sticky backed.  


Of course I have to clip on the plastic diffuser cover.  The one thing I haven't told you is that I broke the old on -off switch so I'll have to source a new one.  So all in all I will have probably spent about three pounds. The LEDs cost about ten quid for a five meter spool so you can convert all your lights with one spool. I think we have seven such lights on Herbie.

Will it work? Well we'll have to see when I connect it up. How much light will it give?  I refer you to my previous answer.

I'll write it up in more detail if and when it works.

We're back to the boat later today ready for the dreaded BSS inspection tomorrow.  Fingers crossed. 

Sunday, November 06, 2022

Soup, sparklers, photos, cock-ups and cats

 Well, my entry to the Ventnor Marina Moorers Association annual photo exhibition didn't win. I know!  Shock horror!

 I resisted the temptation to don a bison horned hat and storm the marina office holding a Stop the Steal placard, mainly because I didn't think my picture was good enough anyway.  I'd like to show you the winning photo but as it's not mine I can't.  For the record, here's the one I entered (guided by your comments - thanks).


Association members cast their votes and the winner got a framed print of his/her picture.  Apparently five people tied for third place and I wasn't even one of them, so you may rightfully refer to me as Also Ran.  One of the third place pictures was of a beautiful Turneresque sunrise over the marina and featuring Herbie in the foreground.  I wanted that one to win.  We are going to contact the person who took it and ask if we can use the picture, so hopefully I'll be able to show it to you.

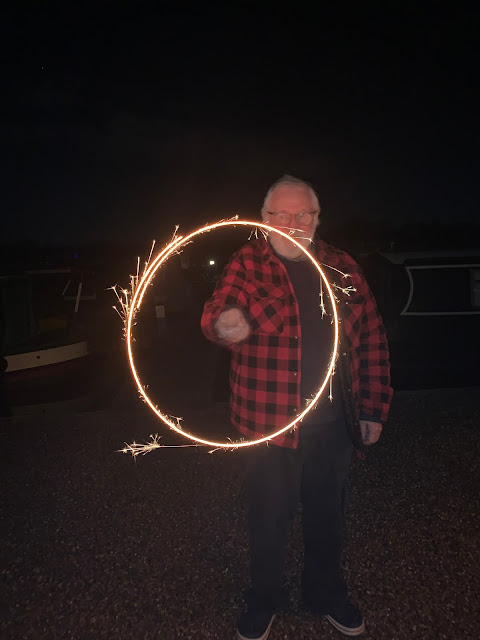
Still it was a jolly evening and we all had home made soup and mulled wine and waved our sparklers to show what big kids we all are (although I suspect the average age of the 34 people who attended was north of 60 years old).

Here's Kath in sparkling form


and yours truly demonstrating my rodeo skills.


So we're on Herbie for a couple of days.  Surprisingly we're warmer here than we are at home.  Our house thermostat is set to 17.5 degrees these days in order to save the planet for you.  On the boat I dare say our use of fossil fuels is not so praiseworthy.

Now here's an interesting thing.  We're booked in for a boat safety inspection on 14th November, and today I got a phone call from the examiner Mike Allen to say that on the BSS database, we're down as not needing one until 2024.  Well I checked back over our records and we were last tested in 2018 so we should be due now.  Mike duly checked back and confirmed that we were indeed certified in 2018 so presumably a certificate for someone else's boat  in 2020 has been wrongly attributed to Herbie.  He's going to phone BSS office tomorrow and put them straight.

Meanwhile we're off to Cambridge to visit Charlie, our Peter's new kitten who likes to watch old episodes of Mythbusters on TV.