Monday, April 30, 2018

One swallow does not a summer make

Cruising below Bourton lock on Saturday we were treated to an aerial display by a gang of swallows swooping and skimming around us like jets round an aircraft carrier.  What with them and the cowslips along the banks and the hawthorne bushes all budded up ready to burst out the May blossom, you might expect it to have felt like spring.  Well if you’re reading this in the UK, you’ll know that it flippin’ well didn’t.  The only reason that we were out on Herbie was that we were baby sitting Grace for the weekend and her entertainment of choice was to go boating.  We didn’t feel so keen looking at the weather forecast and we did warn her that it would be cold and wet and that she would need to be out on the back of the boat etc. but she was adamant. So that’s what we did, and I have to say she was a real trooper.

Grace is only ten years old but she’s turning into a right good boater. She did her bit at every lock and did 90% of the helming too, even turning us nicely at the awkward Tramway winding hole below Banbury.  All I did was stand beside her offering the occasional word of advice or encouragement.  Hopefully when Kath and I get too old and frail to do all this stuff, Grace might be able to take us out for a trip. 

Some of the lock paddles down there are pretty heavy and stiff, but she wouldn’t give in, adopting a technique of hopping back and forth across the balance beam to get a good pull on the windlass.

           IMG_1829[5654]             IMG_1831[5653]

I did my bit of course

IMG_1822[5655]

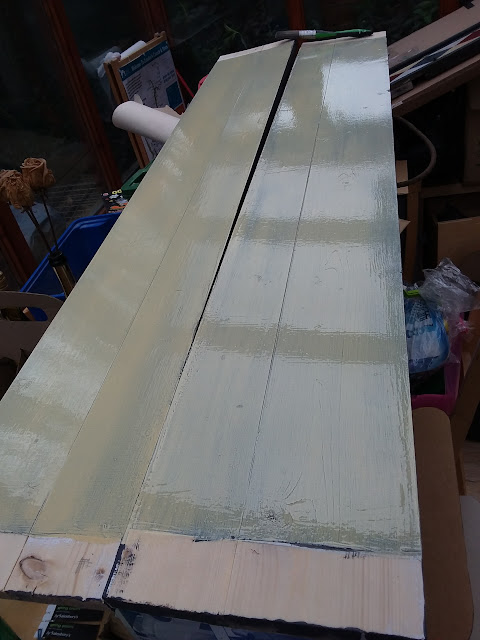
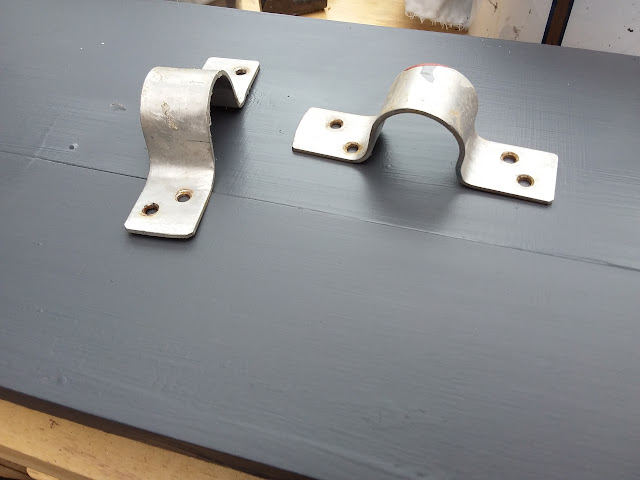
As we were returning after turning the boat a kind man on a boat whose name I have unfortunately forgotten, but it was something about a Wren, enquired after our roof box – he was obviously a blog reader.  Well there are still tiny bits to do. One thing we are thinking of is stiffening the edges of the canvass cover with a dowel to keep the edge straight.  It has tended to pucker up in the past, allowing rain puddles to collect on the canvass.  My expeditions to Wickes /Toolstation for bits and pieces are a bit restricted at the moment as our car has developed an electrical fault.  It goes in for (I hope) a fix tomorrow.

Having temporarily satisfied Grace’s boating desires we are now negotiating with Peter, our youngest son, over a break with him next weekend, so we might be out cruising again.  He is not nearly such a good helmsman as Grace, but you can’t be good at everything and he is amazing at lots of things.  I don’t know where he gets it from, I can’t be good at anything much.


Friday, April 27, 2018

Roofbox–the final solution

The final design problem solved!  Rummaging in my odds and ends box I found a bag of these


IMG_20180427_103354

I can’t remember when I bought them or what job I used them on, but I seem to have hung on to a couple of dozen spare ones.  For scale, they have a six mm thread in the round end.  You screw them into a pre drilled hole with a hex key. (Sorry to insult the intelligence of DiYers, but some reader may not be familiar).Well, just the job for my roofbox ridge pole.  I sunk them into the ends of the pole like this. That’s a 28mm dia pole.

IMG_20180427_103504

In my bits and bobs were some nice 6mm screws with wide domed heads and some washers, and hey presto:

IMG_20180427_104304

Job’s a good ‘un as they say.  Rigid, but quickly.removable. I didn’t even have to splash out a couple of quid on a broom handle because my old ridge pole, although marginally too short for the old design, is fine for this one.

Kath has reinforced the sewing on the cover, and it fits (phew!), so apart from a few little cosmetic jobs ( e.g. screwing on some bungee cord buttons, ooh and mustn’t forget the tv aerial bracket)) we’re done and dusted.  The  floor board’s from the old box are a loose fit, but that’s fine, they’ll let any water out.

I got a gentle reminder (thanks) from Marilyin McD to slap three coats of paint on those bare wooden leg tops.  Little does she know I have already sneakily applied three coats of yacht varnish, which is better for that job and won’t be seen from the outside.

Is it straight out to Herbie to install the box then?.  “Would that it were” as a certain TV presenter might have said.  First I have to repaint the boat roof where the old box stood.  Not a quick job because inevitably the box feet took their toll on the paint.  When will it ever end?


Thursday, April 26, 2018

Roof Box - cunning features to finish off.

Nearly there.  Now I’m down to the finishing touches.  First the end gables which hold up the canvas cover in a pitched roof style to run off the rain.  What is cunning about these is that they can be quickly removed for passage under very low bridges. Such bridges don’t come along very often, but I can think of two or three where we’ve had to lower stuff.  You certainly don’t want to have to lift off the whole box.

IMG_20180426_113859

The board just slides in behind those metal brackets which I fashioned from a length of aluminium angle from Wickes.  This is an improved system since my last box when the end gables just rested there on the corner leg tops.  The ridge pole sat in little cups screwed to the gable, which was all very well when the cover was stretched over, but it fell to bits every time the cover was removed to get at the contents of the box.  This time the gables will stay put.

That just leaves the ridge pole.  The old one is just too short so I needed to source a new one.  This is where my parsimony comes in.  A length of suitably thick dowel from Wickes would have cost an outrageous £14.59, but over the road at Toolstation I can get a 5ft wooden broom handle of the same diameter for £1.91.  Or I could if they were in stock.  They’ll have some more tomorrow.  I might be rubbish at carpentry but I’m a master at sourcing.  I now need a cunning plan for supporting the ends of the ridge pole. Something that will let it lift out easily, but not fall out easily.  I feel a test rig coming on.

Tuesday, April 24, 2018

Roofbox part 8–now the come-uppance for my incompetence.

I told you I was no good at woodwork.  Now that the roof box is nearing completion I can see the mistakes I made.  It may astonish you to find that my box is less than perfect.  It doesn’t surprise me, just like any software I write, it doesn’t have faults, I prefer to call them features. Read on below to learn how to include the same features yourself so your work can look home made like mine. No-one could possibly think mine was professionally made. What would be the point of that?  First though, lets look at where I’m at.  Here is the box minus its floor and the “gable ends” (more of which later).

IMG_20180422_171727

The picture shows the box turned upside down.  Just like an insect, it now has six feet.  Here’s a close up of one of the feet the right way up.

IMG_20180424_170355

Such exquisite joinery.  I put one piece of wood against another with a dob of glue, then drive in a screw. This time I used Gorilla glue, I figured that if it’ll glue gorillas together it must be strong. So what you see here is a corner of the box, where the grey leg is glued and screwed (from the outside) to the cream side planks, and there’s end of the (new design)  rail which will support the loose laid floor boards. At least i hope it will.  Believe me, if I can do it, anybody can.  I doubt very much if it is mega strong, but it only has to sit there rather than being hoiked about and stressed.  The feet are cut off at a cunning angle to allow for the curve / slope of the boat roof.

So what incompetencies can you learn from me?

1. Buying wood.  I get mine from Wickes, which I dare say is no worse than anywhere else.  I know by now that wood is never flat and straight.  It might be when they cut and plane it, but wood of this quality is not stable.  if you’re as useless as me, you’ll grab a pack off the shelf and find out how bad it is when you get home.  That’s why the plank at one of the box ends is charmingly dished so that it doesn’t lie flat against the leg, thus weakening the corner.  i had to resort to making little wooden wedges to fill the gaps.  Smart people take a good look at the wood in the shop and sort through to find the good bits. Bah!  Boring.

2. Precision. Why not be like me and measure to the nearest millimetre before casually sawing somewhere near the line?  It makes it so much more fun trying to make the corners of the box meet, especially when your right angles are anywhere between 86 and 94 degrees.  The charming little gaps so produced in the joints are ideal as homes for spiders and the like  (doing my bit for the environment. I might designate the box as organic.)  and the rain can get in to keep the wood from drying out.

I am however, very proud to say that i did remember to measure my car boot before I glued the box together, and the assembled box will fit in for taking the box up to Herbie. At least I think it will.

Well we’re near the end of this project.  Just the gable ends and the ridge pole for the cover to complete.  I have cunning plans /new designs for both items so stay tuned.

Friday, April 20, 2018

Magical History Tour


Here, demonstrated by my lovely assistant Rick, is a boat battery. A bit bigger than yours and mine eh? What if I told you that this week we were on a boat powered by 300 tons of these batteries? Yes I did check that figure, 300 tons! Then what if i told you that the boat could recharge the all the batteries from its diesel engines in two or three hours? Then what if I told you that at maximum speed the batteries would only power the boat for about half an hour, or at canal speeds, 3 or 4 knots, the batteries might last a day and a half? Have you guessed what boat this is? Answer towards the end of this post.

Here's another picture of Rick at the same site.


Can you see him? If you follow the right hand white line on the floor and enlarge the photo, he's there with his arms outstretched. This is half the floor of the upstairs part of a shed. Some shed huh? All made from timber using construction methods used in building timber ships in the early nineteenth century. Well it would be, because this is where wooden warships were built and fitted out. Downstairs is now crammed full of all sorts of old machinery including some made by the firm that Rick and I used to work for when we first met in the dark ages.

Then, on the same site, we took a look at this machine in operation.


This is in the longest brick built building in Europe, and the machine is making something nearly a quarter of a mile long. Rope. An amazing thing to watch. Here's looking down the building. We never ot to see the other end - too far away.  The workers use a bike to go up and down.


They made two such lengths together in about fifteen minutes. The machinery and method are unchanged since Victorian times.

If you think all this, and a lot more, is worth seeing, take yourself down to Chatham Historic Dockyard,


where you can see how they built ships like HMS Victory, as well as 20th Century Naval ships and fitted them out. It's a vast site with beautifully kept buildings and  it's a totally brilliant museum with so much to see, including HM Submarine Ocelot, which is of course where all those batteries belong. You get a full bow to stern tour of Ocelot, and if you do, you'll never again complain about lack of space on a narrowboat!

The whole site is immaculately set out and truly fascinating. (You'll gather I quite liked it!) For me, one of the special bits was to stand in the mould loft where they showed us how the shapes of the hull of Victory were laid out, but unless you don't like boats or rope, or beautiful buildings, or history, or Victorian engineering, you'll find something to enjoy.

PS. We also visited Winston Churchill's house, William Morris's house and the National Trust's most daring and expensive(and amazing) house restoration, Ightam Mote, while we were at it. Every one a gem. Four days well spent.

Sunday, April 15, 2018

Roofbox part 7 - Man versus paint

Make no mistake, paint is out to get you. All week the weather has been pretty cold, making the paint slow to dry. So on Saturday I came to the final colour, the Hempel(formerly Blakes) Bordeaux Red.  This is good quality coach paint and as you might expect, free flowing even if it does cover fairly well.  So Saturday, out comes the sun, warming up our conservatory so that the paint turns the consistency of semi skimmed milk ready to seep beneath even the best of masking takes on a wooden surface.  That’s the problem you see, the better paint flows, the more it seeps.  You can’t win against the flippin’ stuff.

Undaunted I pressed on.  One coat Saturday and one Sunday.  Nervously I pull off the masking to reveal this.

IMG_20180415_174435

Baaah! Similar damage on all four planks.  Well I had sort of expected it. Sometimes the red had bled over the white as you see above , and sometimes it was on the cream.

I take a deep breath and get out the tiny artists brush.  Best get on with the touching up rather than weep and wail. 

Now this goes to show why it’s worth keeping your cool and soldiering on. In well under an hour I had got all four planks looking like this.

IMG_20180415_185851

Tadaah!!

That’ll do nicely. It just demonstrates that no matter how incompetent you are and no matter how inconsiderate your paint can be, you can get an acceptable result, so don’t let my tales of troubles put you off.

That just leaves the probable debacle of the assembly of the box next weekend.  Hopefully the paint will have hardened off quite a bit by then.

Just after I had finished, we had a visitor in the garden.  I suppose he or she  might have looked at my painting efforts before giving his /her opinion thus:

IMG_20180415_154455

Sorry for the poor photo quality, it was taken through two sets of double glazing and their associated reflections.

I leave that corner of the garden as a wildlife area, so perhaps I should be pleased, but I had never envisaged it as a fox latrine!


Friday, April 13, 2018

How not to make a roofbox–part 6 disaster narrowly averted

The next time I see an Old English Sheepdog I’m going to bust him on the nose.  That flippin’ Dulux paint (barely the consistency of single cream) weedled its way under my masking tape in n places, (where n is a large positive integer).  You expect a bit of bleed here and there, but not that much. “Never mind,” I thought to myself,”take the rag away from your face, now ain’t the time for your tears.” (a few brownie points are available for anyone who can tell me who wrote those lines).

The offending leaks were largely onto the dark grey gloss, so out came my tiniest artists brush and the tin of grey paint.  Cursing that mop top dog, I spent ages trying to steady my shaking hands as I touched up all the mini splodges and runs of cream paint. It’s a wonder I didn’t pass out, what with holding my breath most of the time. Then, just as I was about to finish the last plank I got demob happy and lost concentration. Dipping my brush in the grey paint I forgot to wipe off the excess paint and drawing the brush out of the can, ran a huge run of dark grey paint all over two yellow and white triangles. “Oh woe is me” I cried (or something which means the same but is somewhat less printable).  Fortunately, being and old hand at painting mistakes, I knew what to do and quickly soaking a kitchen towel in white spirit I managed to wipe off the grey before it took hold. Phew!

So now the planks look like this:

20180413_165816

a closer look:

20180413_165848

All that’s left to do is the painting of the red diamonds in between the grey ones and to seal the bottom edge of each plank, which for no good reason I have so far neglected to do.  In the words of my unfavourite American President, “It’s gonna be great”.

With luck I might have finished the painting by Sunday, then the dreaded assembly of the box will have to wait a few days.  We’re off with Rick and Marilyn to darkest Kent on a mini break of our own devising.  More about that when we get there.  There may well be some boaty stuff.

Today i am mostly listening to Bix Beiderbeck an artist of whom I know little, but recommended to me by my friend Stephen and also by Ry Cooder who played some of his tunes on his “Jazz” album.  It is very easy to like ( and I am known for being a bit picky over these things). If you have access to a streaming service give him a try.

Wednesday, April 11, 2018

How not to make a roof box– too much paint and not enough concentration.

It is possible I might have acquired a bit too much white paint.  I think all the white bits are now done and dusted and here’s what’s left in the tin.

IMG_20180411_115402

Well the rest will come in handy should I ever decide to paint the whole house (or possibly the street) at home.  This is Wickes Liquid Gloss.  I can’t remember when and why I bought it but I must have been in an optimistic mood. I’m happy to report that it is possibly the nicest paint to use of the lot. It goes on well and , for white paint, covers well.  Anyway when you’re doing a job with all these paints, you need to use what you have or else spend a fortune.

My enemy at this point is concentration, or rather the lack of it. How easy it is, dear reader, to mask the wrong side of a line.  I know because I have done it twice.  I did spot it in time however so I didn’t paint in the wrong place. Such is my general bewilderment over what I’m supposed to be doing that I have taken to putting dabs of masking tape on areas I’m not supposed to paint.  Like this. 

IMG_20180411_111531

The dabs are on bits that will later be cream.  This is the masking for the white triangles which alternate with cream between the larger red and grey diamonds.  It all gets a bit frustrating at this stage.  A few minutes masking, a few minutes painting then a 24 hour wait for the paint to dry before you can move on to the next bit.

This idea of using a layer of white gloss is all very well, but after I’d done it I realised I’d covered up all my marking out, so I had to do it all again.  However after the four planks and the double marking I now have all the dimensions in my head, no doubt crowding out more useful information like which side of a line to mask.

Looking closely at the planks, I see one has quite a bow across it’s face, so I’m not looking forward to finding out how well it will  (or more probably will not) fit against the corner post.  That’s the beauty of all this painting before building, you get the excitement of not knowing if you had wasted your time.

Today’s cliff hanger: The dreaded Dulux cream on top of white gloss next.  That’s bound to go well I keep telling myself.

Monday, April 09, 2018

How not to make a roof box part 4– sloppy precision

People have looked at my previous roof boxes and commented on the precision of the painting. Little do they know that my painting is very sloppy, it’s the masking that has to be done carefully.  here’s the proof:

Careful Masking

IMG_20180408_145611

IMG_20180408_145602

Slapdash Painting

IMG_20180409_102346

See what I mean?  A chimpanzee could have slapped that white on.  It took quite a while to do the masking and no time at all to do the painting.  I’m using good low tack Craftmaster plastic masking tape which I trim carefully with a craft knife at places like the diamond points. The Craftmaster tape nearly always comes off cleanly which is why I like it. Now I juts have to hope that I don’t get much bleed under the tape.  A little bit of bleed is inevitable in some places because of the grain of the wood, but I’ll touch that up at the end with an artist’s brush.

As you can see I’ve decided to use white as a base topcoat underneath what will be the white, red and cream paints, but, I hope understandably, I’ve painted the grey border and diamonds directly onto the grey undercoat.  After two cost of grey topcoat the grey is actually finished now – hooray. Only three more colours to go.  I reckon that’ll take about another week though, to allow drying between coats. Not quick is it?  However it rarely takes me more than an hour each day –often mush less.

At the weekend we snuck out to Herbie and cruised all the way from Cropredy Marina to Cropredy Lock – less than ten minutes!  That was because we had arranged to meet up with the Moomins who were passing through on Nb Melaleuca. We all spend a jolly evening together and shared a meal, me doing a pasta dish and Simon making a crumble for pud.  next morning they went on their way south and we turned back to the marina then home.  Time well spent. And – our solar panels once again made more electricity than we used.  Very rewarding.

Must stop now, I’m off to do some more painting.


Wednesday, April 04, 2018

How not to make a roof box - part 3- painting nigtmares

Only an idiot would design a roof box using six different tins of paint, which makes me well qualified as it would appear that I am indeed an idiot. Not only have I used an undercoat colour that is most difficult to cover with my chosen top colours, but my design also requires each colour to be bordered with two or even three other colours. This effectively means that I have to keep masking and re-masking different sections and also that I spend half my time cleaning paint brushes to move on to another colour. It is not for the faint hearted i.e. me, but I am sort of committed. I should know better because I went through all this last time. I remember now how each different paint had different flow and covering characteristics and of course I'm using the same stuff again. Can't waste old unused paint.

Here is the basic pattern as seen on the old box.


As you can see, you don't need a lot of the creamy colour, so I decided to make use of the spare paint by using it for the inside surfaces of the box, amply demonstrating how it fails to cover the undercoat.


This is Dulux weathercoat, without doubt the least pigmented paint I have had the misfortune to use. Not only is the pigment thin (yes I did give it a good stir), but the fluid is hyper thin too. No worry about brush marks, it runs out like water off a duck's back. I could probably have just poured it on and let it flow out into place!

'What's so hard about masking up diamonds and triangles?', you might say. Well it's nice straight lines alright, but every time you move from a diamond to a triangle you have to re-mask on the other side of the line. By the time I've done all four sides of the box, I've used enough tape to do a lane on the M6. No I'm not offering. Here's the masking for just the grey bits on one side. It's the fiddly bits at the diamond points that need a steady hand and a lot of concentration, neither of which are my forte.


Note once again my feng shui tidy workbench - like an operating theatre.

If ever I finish all this painting, I'll tell you about the flaws in theoretical wooden box geometry. If that doesn't put you off, nothing will.

I'm enjoying it all immensely.

Monday, April 02, 2018

How not to make a roof box - part 2

What's that saying you use when you've done some painting and you're watching it, waiting for it to dry and it's boring? "It's like," um something or other. Note the scrupulous tidiness of my work bench by the way. Anyone who as been aboard Herbie will know that we are renowned for our feng shui-like clutter free tidiness. (Not.) No wonder I'm always losing bits and pieces.


Well that's kind of where I'm at with the roof box. So while we're waiting for several coats of primer and undercoat to dry, let's look at what was wrong with the old roof box.

Here's the worst bit.


As well as de-laminating, the plywood has worn away where the cover bungee pulled over the edge. A testament to the poor quality of the plywood. Just below, the wood had also rotted where the bungee button was screwed in.


So despite the box lasting seven years, I'm deciding against plywood this time and thinking of putting a protective edging where the bungees stretch over. Maybe a bit of aluminium angle.

Speaking of aluminium, look at these brackets I made last time.


They screw to the centre front of the box and support Herbie's tv aerial pole. A flawed design. Why? Because the pole can, and sure does, turn too easily in the wind, so losing tv signal. You can't have it in a single fixed posotion because the boat moves from place to place so the signal direction changes. So this time I've modified it with a pole clamping screw. Line it up and clamp it down.


I knew that cheap tap and die set from Aldi would come in handy one day. Cutting an M5 thread in the bracket was easy.

I've decided to complete the bulk of the paintwork before assembling the box. Easier that way. I just hope after all that work the flippin' thing fits together. So the next job is the decorative painting. Stay tuned to see what goes wrong with that.